Why You Should Cut Your Poems into Strips and Weave Them Together

Most writers think the only way to fix a stagnant poem is to stare at the screen until the words start to blur. This approach is a trap. It keeps you locked in the same linear path you've already walked a dozen times—a cycle that rarely leads to actual breakthroughs. Instead of wrestling with your thoughts in a digital vacuum, you need to bring your work into the physical world. This guide covers the practice of paper weaving: a tactile method that forces you to dismantle your stanzas and rebuild them in ways your brain simply wouldn't allow otherwise. It matters because the physical resistance of paper changes how you perceive weight, rhythm, and the space between your words.
What happens when you physically dismantle a poem?
When you print your poem and take a pair of scissors to it, you're doing more than just cutting paper. You're stripping away the ego that's attached to the original sequence of lines. We often get precious about the way one line flows into the next—mostly because we've read it that way fifty times. By turning those lines into individual strips, you break the mental glue holding them together. It's a bit like taking apart a clock to see why it isn't ticking; you can't see the gears if the casing is still on. (And let's be honest, sometimes the casing is just a distraction from the fact that the clock was never wound in the first place.)
As you start to weave these strips, you'll notice something strange. Phrases that seemed vital in their original context suddenly lose their luster. Conversely, a throwaway line from the third stanza might suddenly spark a new fire when it's interlaced with the opening image. This isn't just a happy accident; it's a structural realignment. You're forcing your brain to process the text as a visual object rather than a chronological narrative. It's an honest way to find out if your poem has actual substance or if it's just coasting on a pleasant cadence.
"Physical revision is the only way to truly see the bones of your work. If it doesn't hold up when it's shredded, it wasn't holding up when it was whole." — Anders Vega
Can paper weaving help you find better line breaks?
Line breaks are the most misunderstood tool in a poet's kit. Too many people think a line break is just where you run out of breath or where the thought ends. In reality, a break is a choice about tension and release. When you weave your poem vertically (the warp) with another piece of text or even blank paper (the weft), you create physical gaps. These gaps force you to reconsider the weight of every word. You can see how a line feels when it's truncated by a physical weave—how the eye jumps over the interlaced paper to find the next syllable. This creates a natural syncopation that's nearly impossible to replicate by just hitting the enter key on a keyboard.
Think about the way a weaver works. Each thread depends on the one next to it for structural integrity. If you weave a strip of your poem over a strip of contrasting colored paper, the word that sits on top is the one that gets the most attention. This visual hierarchy helps you identify which words are doing the heavy lifting and which ones are just filler. You'll find yourself cutting away the fluff—the 'ands', 'thes', and 'buts' that don't serve the image—just to make the weave tighter and more cohesive. It’s a ruthless process, but a necessary one if you want your poetry to have real impact.
How do you pick the right materials for a poetic weave?
The paper you choose is just as important as the words you've written. If you use standard 20lb office paper, the weave will feel flimsy and cheap. It won't have the tactile feedback you need to really engage with the work. I recommend using a heavier stock for the 'warp' (the vertical strips) and something slightly more flexible for the 'weft' (the horizontal strips). You want there to be a bit of friction when you slide the paper together. This friction slows you down, making you read each word as you move it into place. It’s the opposite of speed-reading; it’s deep, slow, and intentional construction.
| Paper Type | Weight (GSM) | Best Use in Weaving |
|---|---|---|
| Copy Paper | 75-90 | Quick drafts or rough experiments |
| Drawing Paper | 130-150 | Solid warp strips; holds shape well |
| Rice Paper | 30-50 | Delicate weft; allows text to show through |
| Cardstock | 200+ | Structural backing only |
Don't just stick to white paper. Using a muted color for the secondary strips can help highlight the mood of the poem. If you're writing about something cold or clinical, a pale blue or a sharp grey might help you stay in that headspace. (I once used a deep ochre paper for a series of poems about the Victoria shoreline, and the color itself influenced where I chose to break the lines.) You can also use a second poem as the weft. This 'poem-on-poem' weaving is a great way to create a collaborative effect with your own older work. It’s like having a conversation with a past version of yourself, and the results are often surprisingly profound.
The Step-by-Step Weaving Process
- Print two copies: Use a clear, serif font. Space the lines out significantly more than you usually would—double or triple spacing is best.
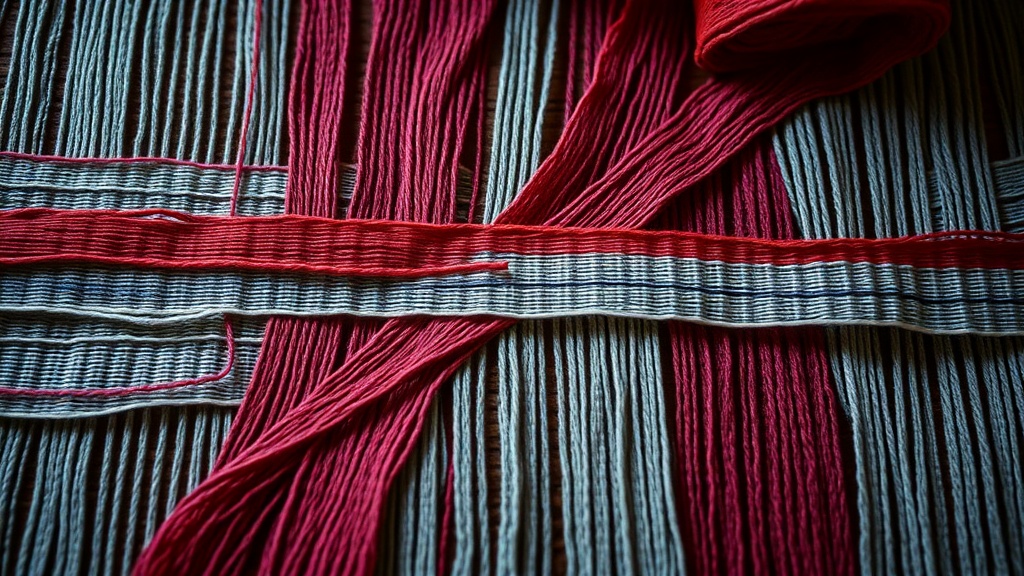
- Prepare the Warp: Take the first copy and cut vertical slits from the bottom, stopping about an inch from the top edge. These strips should be about half an inch wide.
- Prepare the Weft: Cut the second copy (or your contrasting paper) into horizontal strips. These should match the width of the vertical slits.
- The Over-Under: Start at the top and slide your first horizontal strip through the vertical ones. Go over the first, under the second, over the third.
- The Reverse: For the next horizontal strip, do the opposite: under the first, over the second, under the third.
- Tighten the Grid: After every few strips, gently push them upward so they sit snugly against each other. This is where the new 'poem' starts to reveal itself.
As you work through these steps, don't worry about making it perfect. The goal isn't a gallery-ready piece of art—though that can be a nice byproduct. The goal is the friction. The goal is the physical labor of making your words fit together in a new way. You'll find that some lines simply refuse to be woven. They're too long, too clunky, or they just don't fit the new rhythm. Mark those lines. They are likely the parts of your poem that need the most work. On the other hand, you'll see new connections—internal rhymes and alliterations—that were hidden in the original linear format. These are the gems you’ll want to keep when you go back to the digital draft.
Using this method isn't just about 'changing things up'. It's about respecting the craft enough to get your hands dirty. We live in a world that wants everything to be fast and frictionless, but art is often found in the places where things don't quite fit. By physically weaving your stanzas, you're embracing that difficulty. You're choosing to look at your work from a perspective that isn't dictated by a software developer's idea of a 'user-friendly' interface. You’re back in the realm of the tangible, where the weight of a piece of paper can be just as expressive as the weight of a metaphor. Check out more on experimental structures at The Poetry Foundation or look into Poets.org for primers on unconventional forms. If you're curious about how this ties into broader art movements, the MoMA's guide to collage offers some great historical context. Stop looking at your screen and start looking at your desk.